Here’s a surprising fact – 70% of home cooks struggle to get their holiday ham just right. Dried-out meat and burnt glazes make cooking a large ham feel like walking through a culinary minefield.
You can make your Costco ham stand out from the crowd. A classic Kirkland ham or premium spiral-cut variety can elevate your meal from good to restaurant-quality spectacular with the right Costco ham instructions.
My experience as a professional chef includes cooking hundreds of spiral hams, and I can tell you something important – that perfect, juicy, caramelized finish isn’t exclusive to professionals. You’ll create an impressive spiral ham that makes your guests ask for seconds once you understand temperature control, glazing techniques, and timing.
The secrets of cooking the perfect Costco ham await you. Let’s head over to the essential steps that guarantee success every time.
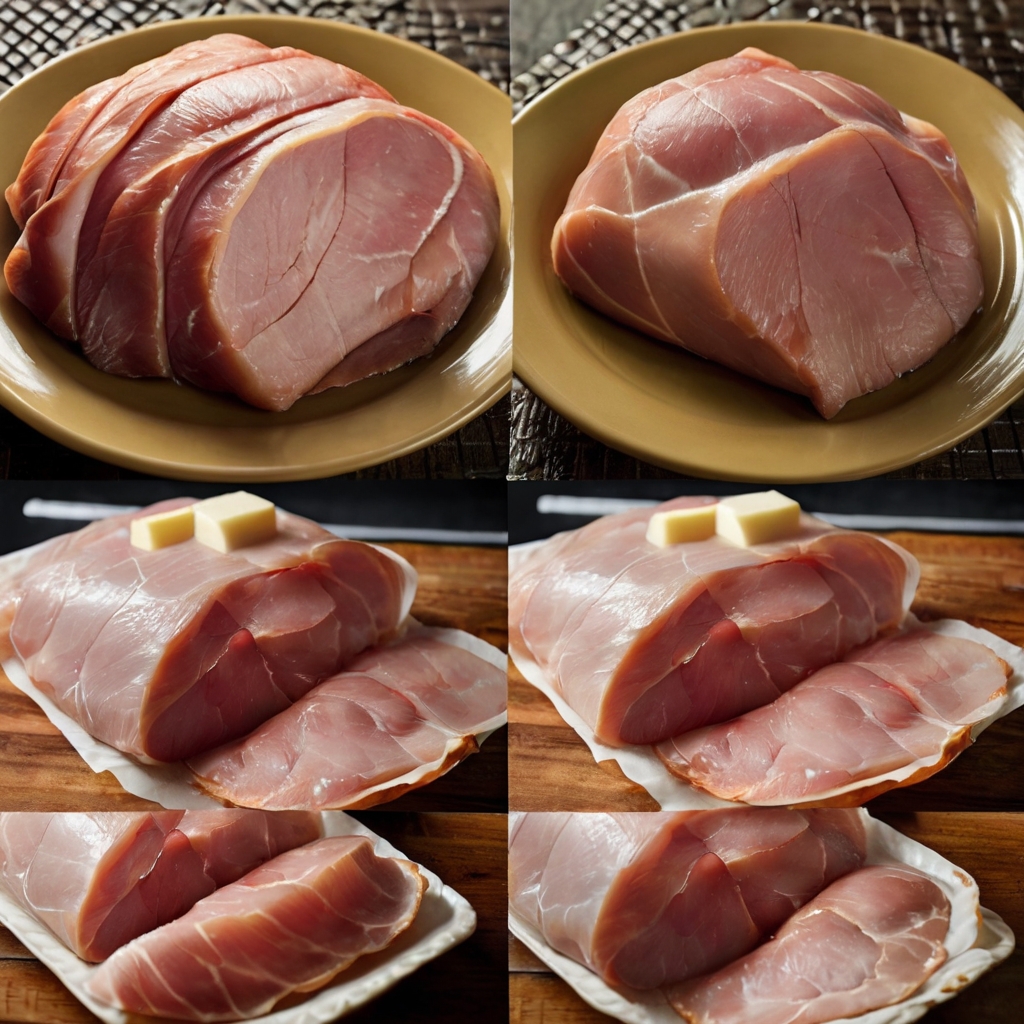
Table of Contents
- 1 Essential Equipment and Preparation
- 2 Master the Perfect Cooking Temperature
- 3 Professional Glazing Techniques
- 4 Moisture Retention Secrets
- 5 Troubleshooting Common Issues
- 6 Here are some FAQs about Costco ham instructions:
- 6.1 How to cook a ham from Costco?
- 6.2 How long to reheat a Costco ham?
- 6.3 How do you cook a frozen Costco ham?
- 6.4 What temperature is a Costco ham done?
- 6.5 How to cook a precooked ham?
- 6.6 How to cook Costco Master Carve ham?
- 6.7 Can I cook a frozen ham without defrosting it first?
- 6.8 Can you eat Costco ham without cooking?
- 6.9 Why is my ham always dry?
- 6.10 Is it better to cook a ham covered or uncovered?
- 6.11 Does ham get more tender the longer you cook it?
- 6.12 Should I put water in the pan when cooking a ham?
Essential Equipment and Preparation
Getting the best results from your Costco ham depends on having the right equipment and preparation. Let’s make sure you’re ready to create something amazing.
Required Tools and Cookware
You’ll need these items to cook your Costco spiral ham perfectly:
- A large roasting pan (9x3x13-inch) with rack
- Reliable meat thermometer (preferably digital)
- Heavy-duty aluminum foil
- Silicone basting brush
- Sharp carving knife
- Deep baking dish (if you don’t have a roasting pan)
Ham Selection and Storage Tips
Costco’s ham is available in the refrigerated deli section or the cooler section with meat. You should plan for ¾ pound per person with bone-in ham, while boneless needs ½ pound per person.
Your ham will stay fresh about two months from purchase date in the refrigerator. The best quality comes from eating it within 3-5 days after cooking. The ham can safely stay in your freezer up to one year if you need longer storage.
Bringing Ham to Room Temperature
The right starting temperature is vital for even cooking. Take your ham out of the fridge 30-60 minutes before you start cooking. A warm water bath (100°F) can speed up this process while the ham stays in its original packaging. This method helps distribute heat evenly during cooking.
Pro Tip: The water bath works best if you soak for 45 minutes, then refresh the water and continue another 45 minutes. Your ham will reach the perfect starting temperature this way.
Place your ham flat-side down in the roasting pan after removing all packaging materials. This position will distribute heat evenly and keep moisture locked in throughout cooking.
Master the Perfect Cooking Temperature
The perfect Costco ham depends on precise temperature control. Let’s become skilled at controlling temperature to cook your spiral ham just right.
Understanding Your Oven’s Hot Spots
Your oven’s quirks can affect how evenly your food cooks. Getting a full picture of hot spots is vital to even cooking. Try this simple test: place white bread slices across your oven rack and bake at 350°F for a few minutes. Dark spots will show where your oven runs hot. Uneven browning means you should rotate your ham while it cooks to get the best results.
Temperature Guide for Different Ham Sizes
Your Costco spiral ham needs a steady oven temperature of 325°F. Here’s everything you need to know about timing:
- Bone-in spiral ham (7-9 lbs): Cook for 10-18 minutes per pound
- Whole bone-in ham (10-14 lbs): Heat for 15-18 minutes per pound
- Half bone-in ham (5-7 lbs): Warm for 18-24 minutes per pound
Pre-cooked Costco hams should reach an internal temperature of 140°F. Uncooked hams need to hit 145°F and rest for 3 minutes.
Using Meat Thermometers Correctly
A thermometer will be your best friend to achieve the perfect ham. Here are some expert tips:
- Push the thermometer at least two inches into the ham’s thickest part
- Keep the probe away from bone or fat to avoid false readings
- Insert the probe sideways for thinner sections
Pro Tip: Pull your instant-read thermometer back through the meat slowly. The lowest temperature you see shows the true internal temperature.
Leave-in probe thermometers work best as early warning systems rather than your only temperature guide. Double-check with an instant-read thermometer before serving to get the most accurate results.
Keep an eye on your ham after the first 45 minutes. Cover any darkening areas with foil while the rest continues to cook. This method gives you even cooking and prevents parts of your Costco spiral ham from drying out.
Note that most Costco hams come pre-cooked, so you’re really just reheating them. Staying at or below 140°F will keep your ham juicy and delicious.
Professional Glazing Techniques
Your Costco spiral ham can go from good to extraordinary with the right glazing technique. These professional methods will help you achieve that picture-perfect finish.
Classic Honey Glaze Recipe
The perfect glaze combines sweet and tangy ingredients perfectly. Costco hams include a glaze packet, but making your own delivers better results and lets you customize the flavors. Here’s a professional-grade honey glaze recipe:
- 1 cup brown sugar
- 1/2 cup honey or jam
- 1 tablespoon Dijon mustard
Pro Tip: Add a splash of bourbon to raise the flavor profile, or use orange juice instead of jam for a citrusy twist.
Timing Your Glaze Application
The right timing makes all the difference in glazing. These steps will give you the best results:
- Start glazing with 30-45 minutes of cooking time left
- Take the ham out and brush on your first layer
- Put it back in the oven uncovered
- Add more glaze every 15-20 minutes
Important: Early glaze application can burn the sugars and create bitter flavors.
Creating a Caramelized Crust
A glistening, caramelized exterior shows off a professionally glazed Costco ham. Here’s how to achieve it:
Set your oven to 325°F to prevent sugar burning. During the final glaze application, turn up the heat to 425°F for 8-10 minutes. The higher temperature creates that sought-after caramelized crust and locks in moisture.
Chef’s Secret: Brush honey or maple syrup over your final glaze layer for extra shine. Your guests will reach for their phones to capture this stunning presentation.
Let your glazed ham rest for 5-10 minutes after cooking. This allows the caramelized sugars to set and juices to redistribute, which results in perfectly glazed, moist slices.
Brush the glaze between spiral cuts to maximize flavor. This technique gives every bite that ideal balance of sweet glaze and savory ham, creating a truly memorable Costco spiral ham.
Moisture Retention Secrets
A moist Costco spiral ham is the life-blood of a memorable holiday meal. Let’s discover professional secrets that keep your ham juicy throughout the cooking process.
Proper Wrapping Methods
Your ham’s texture depends on proper moisture retention through wrapping. The aluminum foil technique you use can make or break the final result. These professional wrapping steps create a moisture-sealed environment:
- Double-layer your heavy-duty foil to insulate better
- Make tight seals at all edges so steam stays trapped
- Place ham cut-side down before wrapping
- Create a tent-like structure when using loose wrapping method
Pro Tip: You can lock in precious steam by wrapping the entire roasting pan in foil to create a complete seal.
Basting Techniques
Basting is a vital part of maintaining your ham’s succulence. The bottom of your pan needs half a cup of wine or stock before you start. This creates a flavorful liquid that keeps your ham moist while it cooks.
Your ham needs basting every 10-15 minutes during the last 30-45 minutes of cooking. This attention helps distribute moisture evenly and creates that perfect outer texture.
Chef’s Secret: Mix the pan drippings with leftover glaze to create a rich serving sauce.
Steam Management Tips
Steam helps create a perfectly moist Costco spiral ham. A continuous steam environment forms when you pour water into the bottom of your roasting pan. This method works because:
- Moisture levels stay consistent while cooking
- The ham’s bottom doesn’t burn
- Heat distributes better for improved results
Steam levels need proper maintenance throughout cooking. The foil should stay sealed most of the time, except during the final glazing period. This approach lets your ham keep its natural juices while developing a perfect exterior.
Temperature Tip: Your ham retains more moisture when cooked at a lower temperature (250°F) for longer instead of rushing at high heat. Testing shows this gentle approach keeps the deep, porky flavor best.
The meat needs 15-20 minutes to rest after cooking. This time allows juices to redistribute, and each slice stays moist. Keep the ham covered with foil during rest time to prevent moisture loss.

Troubleshooting Common Issues
Even expert home chefs don’t deal very well with their Costco spiral ham sometimes. Here are the biggest problems and solutions that will give a perfect ham every time.
Fixing Dry Ham Problems
A dry Costco spiral ham isn’t the end of the world. You can prevent this issue, but there are several ways to save a dry ham. These quick fixes will add moisture back:
- Create a flavorful sauce using pan drippings
- Add warm chicken or vegetable broth between slices
- Brush with additional glaze before serving
- Cover with foil and warm gently at 275°F
Pro Tip: Your ham might dry out while cooking, so add water to the bottom of the roasting pan and cover tightly with foil to create steam.
Dealing with Uneven Cooking
Some portions of your ham might be perfectly done while others stay too cool. Here’s how to fix this common problem:
- Position your ham cut-side down in the roasting pan
- Rotate the pan halfway through cooking
- Use an instant-read thermometer to check multiple spots
- Keep your oven temperature steady between 275°F and 300°F
The most reliable results come from using your meat thermometer to check that all portions hit 140°F for pre-cooked hams. It’s worth mentioning that spiral-cut hams can dry out easily because they’re pre-sliced.
Salvaging Burnt Glaze
A burnt glaze doesn’t ruin your ham. Here’s your recovery plan:
Check how bad the burning is first. You can carefully remove the burnt parts if only the glaze is affected. Mix these ingredients for a new glaze if there’s minor burning:
- ¼ cup brown sugar or honey
- Pan drippings
- A splash of orange juice or cider vinegar
Important Safety Note: You can save slightly overcooked portions, but don’t serve severely burnt sections as they might contain harmful compounds.
These tips will help prevent glaze burning:
- Add glaze during the final 30 minutes of cooking
- Lower oven temperature to 275°F for gentler cooking
- Add liquid to thin out thick glazes
Your glaze might thicken while cooking, so thin it with warm broth or fruit juice. This creates that perfect caramelized finish without burning.
Timing matters a lot when adding glazes. Start glazing when your ham’s internal temperature reaches 120°F. This helps get proper caramelization without burning.
Expert Tip: Create a foil tent over just the glazed parts if your glaze darkens too quickly, while letting the rest of the ham cook normally.
A Costco spiral ham can be one of the easiest dishes to prepare in your kitchen. The right tools, proper temperature control, and expert glazing techniques will help you create an impressive centerpiece that steals the show at any special occasion.
The key to a perfect ham lies in keeping it moist and watching the temperature closely. Note that proper wrapping, steady heat control, and perfect glaze timing are crucial to achieve that beautiful caramelized finish.
Your Costco ham’s preparation starts with the right equipment and proper moisture control. These proven steps are a great way to get the results you want – a juicy, perfectly cooked ham that tastes better than restaurant quality.
These simple techniques will become second nature as you cook more hams. Your confidence will grow with each success, and soon your family and friends will ask about your secrets behind such consistently amazing results.
Here are some FAQs about Costco ham instructions:
How to cook a ham from Costco?
To cook a ham from Costco, follow the Costco ham instructions provided on the package. Typically, precooked hams should be heated at 325°F (163°C) for 10-15 minutes per pound. Cover the ham with foil to keep it moist and baste occasionally with its juices or glaze for added flavor.
How long to reheat a Costco ham?
Reheating a Costco ham usually takes about 10-15 minutes per pound at 325°F. Follow the Costco ham instructions for best results, ensuring the ham is warmed to an internal temperature of 140°F for safe consumption. Cover the ham with foil to retain moisture during reheating.
How do you cook a frozen Costco ham?
Cooking a frozen Costco ham requires additional time. It’s recommended to thaw it in the refrigerator before following the Costco ham instructions, but if cooking frozen, increase the cooking time by about 50%. Always check that the internal temperature reaches at least 140°F.
What temperature is a Costco ham done?
A Costco ham is done when its internal temperature reaches 140°F for a precooked ham or 165°F for a fully raw ham. Use a meat thermometer for accuracy, following the Costco ham instructions to ensure food safety.
How to cook a precooked ham?
To cook a precooked ham, heat it in the oven at 325°F for 10-15 minutes per pound until it reaches an internal temperature of 140°F. Cover the ham with foil and occasionally baste it for extra flavor. Refer to your Costco ham instructions for precise guidelines.
How to cook Costco Master Carve ham?
The Costco Master Carve ham is precooked and boneless, making it easy to prepare. Heat it in a 325°F oven for about 10-15 minutes per pound until the internal temperature reaches 140°F. Follow the Costco ham instructions included for the best results.
Can I cook a frozen ham without defrosting it first?
Yes, you can cook a frozen ham without defrosting, but it will take approximately 50% longer to cook. Be sure to follow the Costco ham instructions for cooking times and ensure the internal temperature reaches 140°F for precooked hams or 165°F for raw hams.
Can you eat Costco ham without cooking?
Yes, you can eat Costco ham without cooking if it is labeled as fully cooked. Most hams from Costco are precooked and only need reheating. Always refer to the Costco ham instructions to confirm.
Why is my ham always dry?
Dry ham is usually caused by overcooking or lack of moisture during the cooking process. To prevent this, follow the Costco ham instructions carefully, use a meat thermometer, and cover the ham with foil while cooking. Adding a glaze or basting the ham helps retain moisture.
Is it better to cook a ham covered or uncovered?
Cooking a ham covered is better for retaining moisture. Cover the ham with foil or a lid while cooking, as recommended in the Costco ham instructions. Uncover the ham during the last 15-20 minutes to allow the glaze to caramelize.
Does ham get more tender the longer you cook it?
Ham doesn’t necessarily get more tender with longer cooking. Follow the Costco ham instructions and cook only until it reaches the recommended internal temperature. Overcooking can dry out the ham, so precise timing is essential.
Should I put water in the pan when cooking a ham?
Yes, adding water to the pan can help keep the ham moist during cooking. This method is often recommended in Costco ham instructions. Place the ham on a rack above the water, and cover it tightly with foil for the best results.